Showing posts with label Homemade. Show all posts

Wednesday, 11 November 2015

Scrumpy The Pony - The Final Chapter

Poor old Scrumpy, to add insult to injury, while I was getting the paint off, I broke his tail in half. So out came the superglue! Having scraped as much paint off him as I could, obviously having to leave the offending pinky-grey mess on his mane and tail, I covered him with a layer of yellow ochre acrylic paint, my reasoning being that the yellow would turn the pink more of an orange colour, which I could just about live with.


Scrumpy a l'orange!
  
I decided to paint him as a blue roan appaloosa, in the end it wasn't the best paint job in the world, but I just wanted to get him finished so that I could move on to something else. He still has a pinky-grey mane and tail, that dodgy pigment seems to travel up through all the layers of paint.
Moral of the story: Don't be a cheapskate!

Scrumpy's apples! (spots)

Is this my best side?

Didn't turn out too badly.

Mane and tail are still pinky...

Who's a pretty boy then?

Tuesday, 10 November 2015

Home Made Wild Bird Food Recipe

It's been a very mild autumn so far, but winter is just around the corner and the wild birds will be needing our help. I feed them all year round, and this is the mixture I use for the bird table. Ground feeding birds like pigeons and sparrows get fed a shop bought mix on the shed roof (this location keeps them safe from predators, and keeps any leftovers out of the reach of mice and rats, but not squirrels!)

Homemade wild bird food recipe

Ingredients
Cup of Tea.
A small handful of Dried Fruit (I use supermarket own brand sultanas).
3 level dessert spoons of Couscous.
1 teaspoon of Chili Powder or Paprika.
1/2 - 3/4 cup of Uncooked Oatmeal.
2 tablespoons of shop bought wild bird seed.
1 fat ball.

Method
Make a cup of tea, you'll need the hot water to soak some of the ingredients, and by the time you've drunk it, we'll be ready for step two.

Step one.

Place the dried fruit, couscous and chili powder in a bowl, cover with boiling water and leave to soak. Now go drink your cup of tea, answer a few emails, read the paper or whatever for around about 20 minutes.

Step two.

Break up a fat ball in your bird feeding dish, you should crumble it into small pieces. I usually mash it with a fork.
By now you should have fluffy couscous and plump sultanas, add them to the fat ball, don't worry if they are a little bit sloppy, but if they're very wet you may have to strain off a little water first.
Put in as much oatmeal as you need to dry the mixture a little. Note that we are using uncooked oatmeal, never use cooked oatmeal, as it can solidify like glue on birds beaks.
Finally add the bird seed, making sure everything is mixed in well.
Now go feed your friends, and be sure to leave some water out for them too!

What?When?Why? Feeding tips
  1. Chili Powder. Birds are not affected by chili powder, but mammals are. If you put chili powder in bird food you will deter rats, mice and squirrels.
  2. Uncooked Oatmeal. As I already explained, cooked oatmeal is very bad for birds. Always use raw uncooked oatmeal.
  3. Bread. Feed bread sparingly, as it is not good for birds.
  4. Peanuts. I mostly feed peanuts over the winter, as fledglings can choke on them. some birds start breeding very early in the year, so be careful. Occasionally I will run some through the food processor and put them in my food mix.
  5. Dog/Cat kibbles. leftover dry pet food is a big hit with my garden visitors. I pop it in to soak with the couscous and sultanas. Never give dry kibbles to birds always soak them first.
  6. Cheese/lard/suet. All of these are acceptable to birds and will help them through the winter, obviously, grate any cheese first!
Happy Feeding!

Tuesday, 25 August 2015

Scrumpy the Pony Part Four

So by now, what had originally been intended to be a simple little project had turned into a nightmare build. Pretty much everything that could go wrong had gone wrong, and there was more to come....

While picking off the paint I started to discover soft spots where the paper mache was collapsing underneath the clay. The only way to deal with this was to push the clay in as far as possible and fill the in resulting hole with clay or tinfoil then clay depending on the size of the hole.

Huge hole on hip filled with tinfoil and clay.
.
air dry clay horse sculpture
Holes underneath chest and at top of rear leg filled with clay.

Huge hole on rear filled with tinfoil and clay.


Monday, 24 August 2015

Scrumpy the Pony Part Three

It was time for Scrumpy to get a paint job, so that the clay and paper mache would be sealed and hopefully he'd look like a proper little horse with some colour on him. I used acrylic paint that I bought in the 99p shop, (the alarm bells should have started ringing right there, but I've bought some good stuff there before).
I started with a layer of black, because the clay dries white and it makes it easier to see which bits you've done, but also because I like to paint from dark to light.
When I checked him several hours later, something interesting had happened, the paint had developed a crackle finish, which I'd never encountered with acrylics before, and the pigment had sort of separated so that he was black with bright pink crackles!

Pink is the new black....apparently.

Friday, 21 August 2015

Scrumpy the Pony Part Two

I added Scrumpy's ears and finished him up, but something didn't look quite right. His legs had splayed out a little bit because his cardboard frame couldn't quite support his weight, and I realised I'd made his knees too big. Knee surgery was the only option!

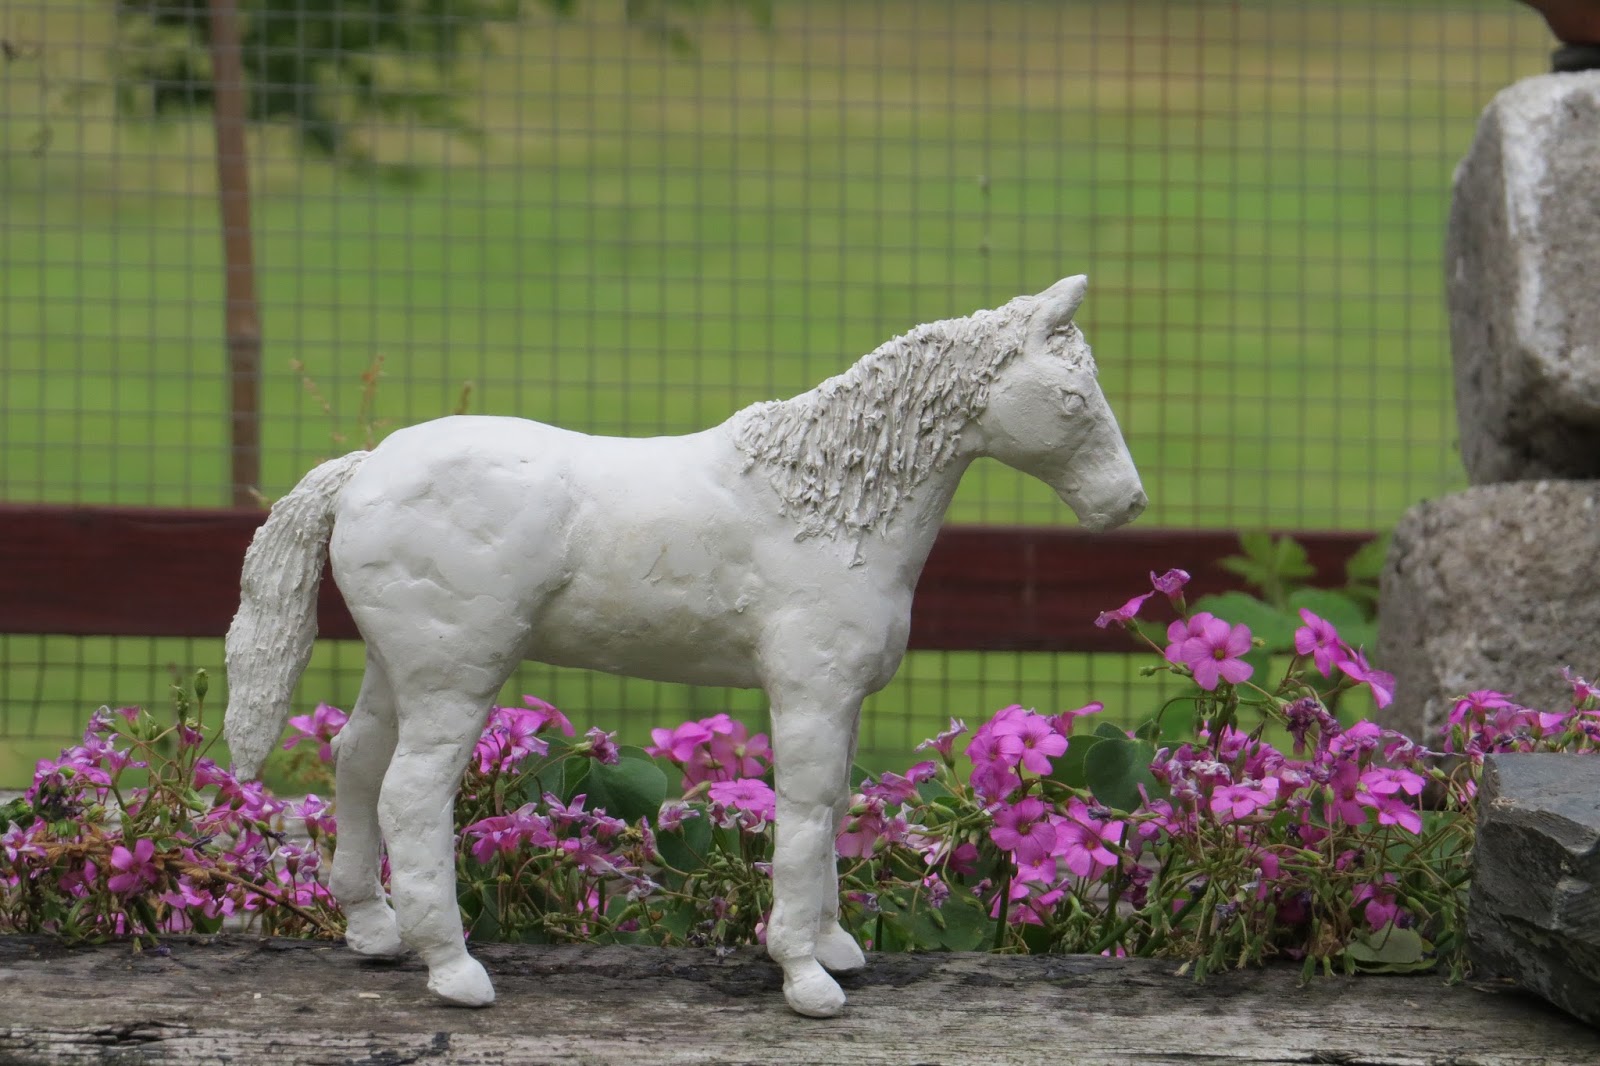
I hacked the clay off his knees, and pulled all the paper out. Then I re-sculpted his knees with some fresh clay, making sure to push the clay well into the void left by the paper. A day later he was dry and looking perky and none the worse for his major surgery. I took him into the garden for a photo shoot.


air dry clay horse scuplture
Scrumpy enjoying the outdoors.
This little fella wanted his pic taken too!

Thursday, 20 August 2015

Scrumpy The Pony - Part One

Having decided to make a fully three dimensional figure, and being too scared to make a model of our dog, I thought I would start on familiar territory and make a horse. Now a horse is just about one of the hardest things you can make, but as a child I adored horses and spent countless hours drawing them, visiting them at the local fields and playing with little plastic models of them. A horse for me would be an easy project.
In theory.

Having done extensive research on Youtube, I determined that I would opt for a paper mache base with clay over the top. I saw a beautiful model made this way at Ultimate Paper Mache
I started by tracing the outline of a real horse from a book, then transferred the outline to corrugated cardboard (making sure to make an extra set of legs!) Next step was to cut the pieces out. Then the body was bulked up with newspaper and tightly wrapped with masking tape. Easy peasy! The same process was used on the legs, and then I added a couple of layers of paper mache and gave it a few days to dry. At this stage my sculpture was starting to look like a Welsh Mountain pony, and I duly christened him Scrumpy. Luckily we were smack bang in the middle of a heatwave, and he was bone dry in no time.


Now I was ready to add the clay, and after a couple of layers he was looking really nice. I was very happy with him.

air dry clay horse sculpture